

The Subusers feature allows you to share access to your Minecraft server without giving away your account credentials. You can invite other users, assign only the permissions they need, and even set an optional expiration date for their access. To make permission management even easier, you can create and reuse Permission Presets for common roles such as moderators, developers, or console-only access. This guide will walk you through adding subusers and using permission presets.
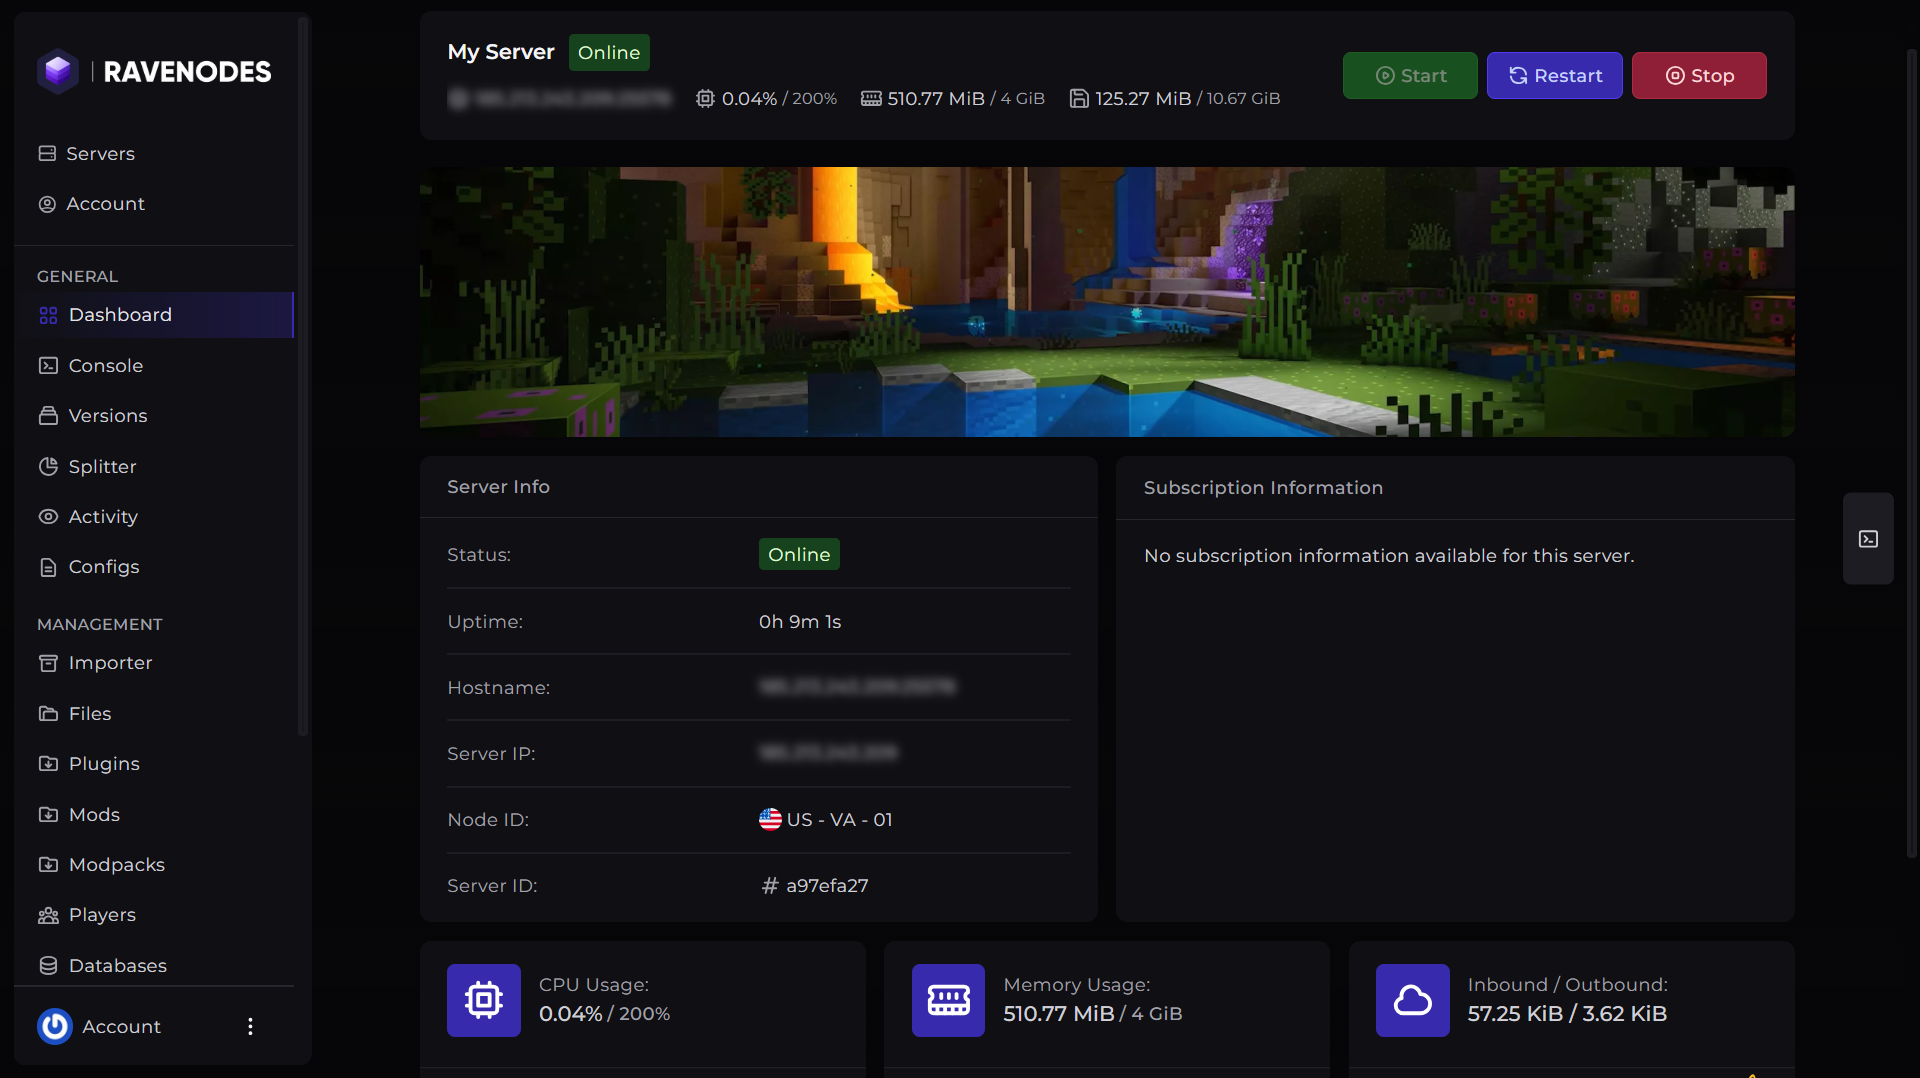
Step 1: Open Your Server
Log in to our Game Panel and head to the Minecraft server you want to manage.
Step 2: Open the Subusers Section
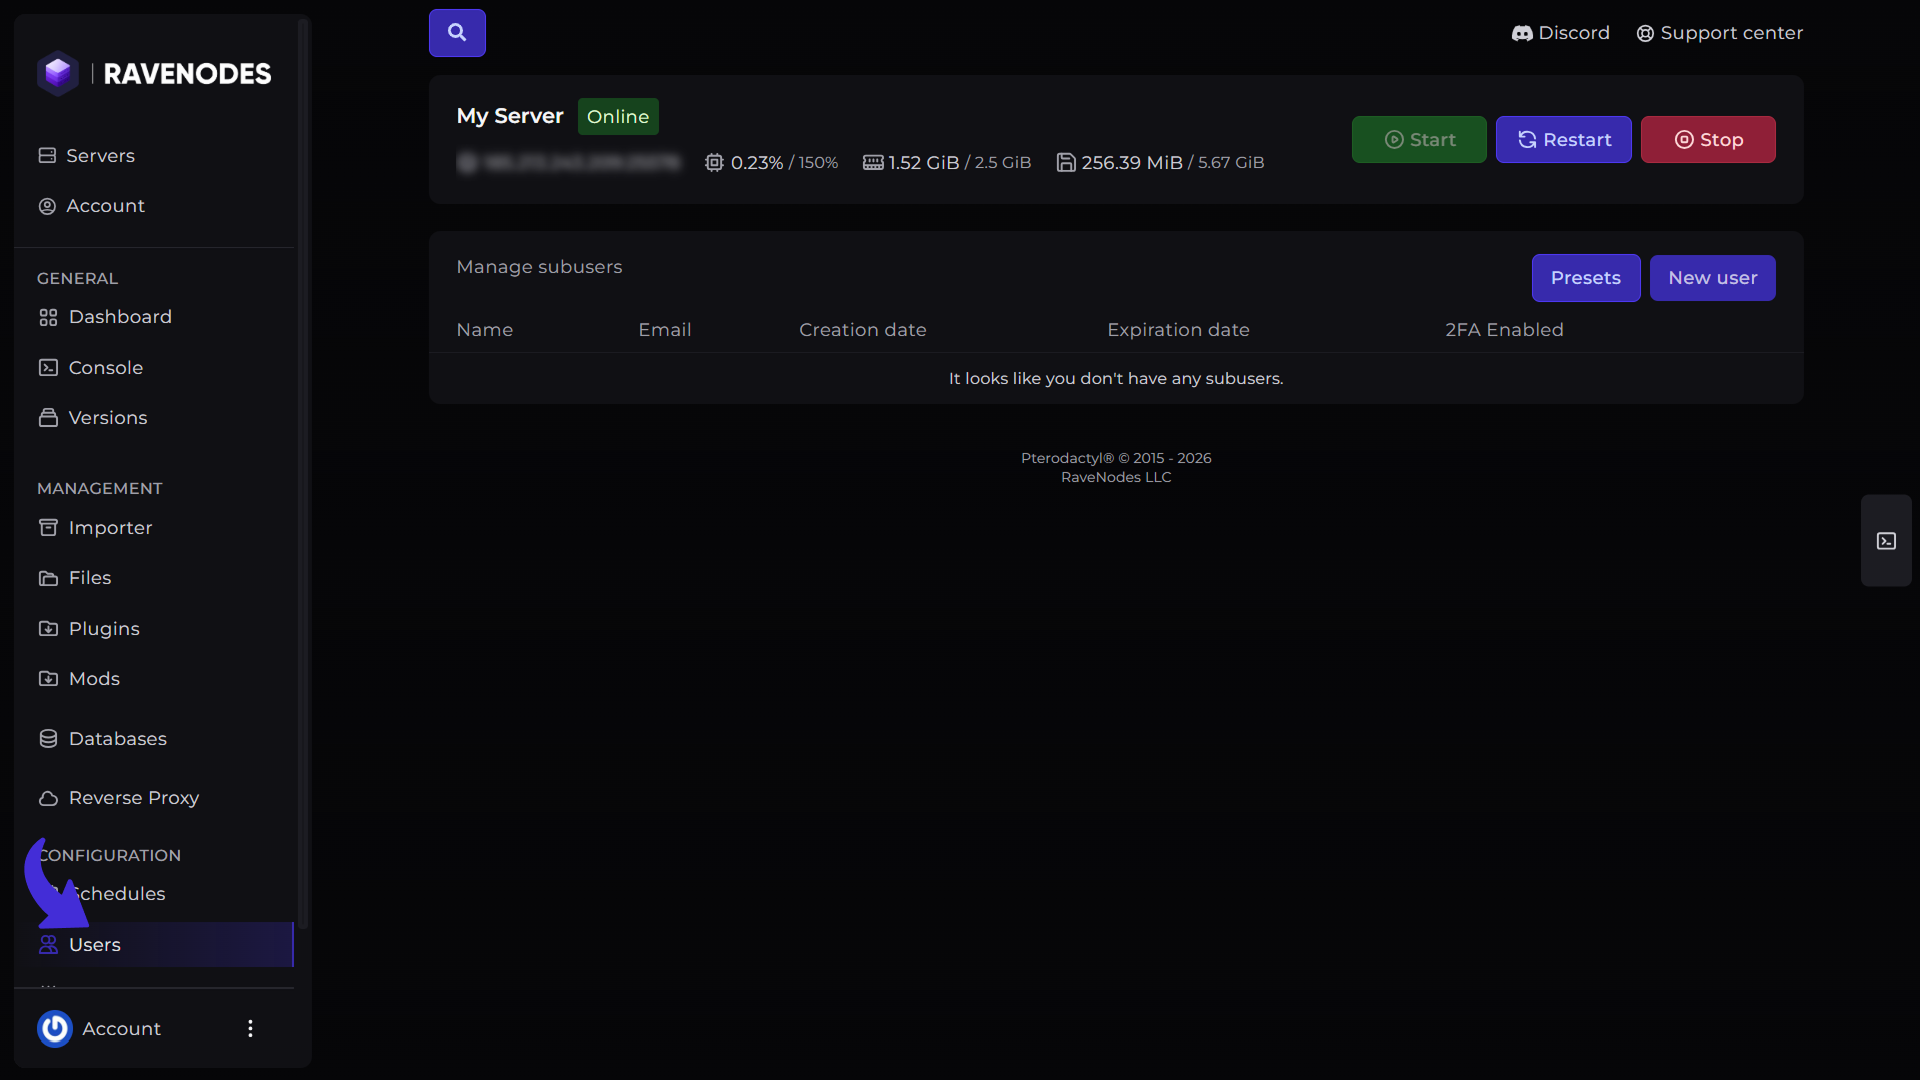
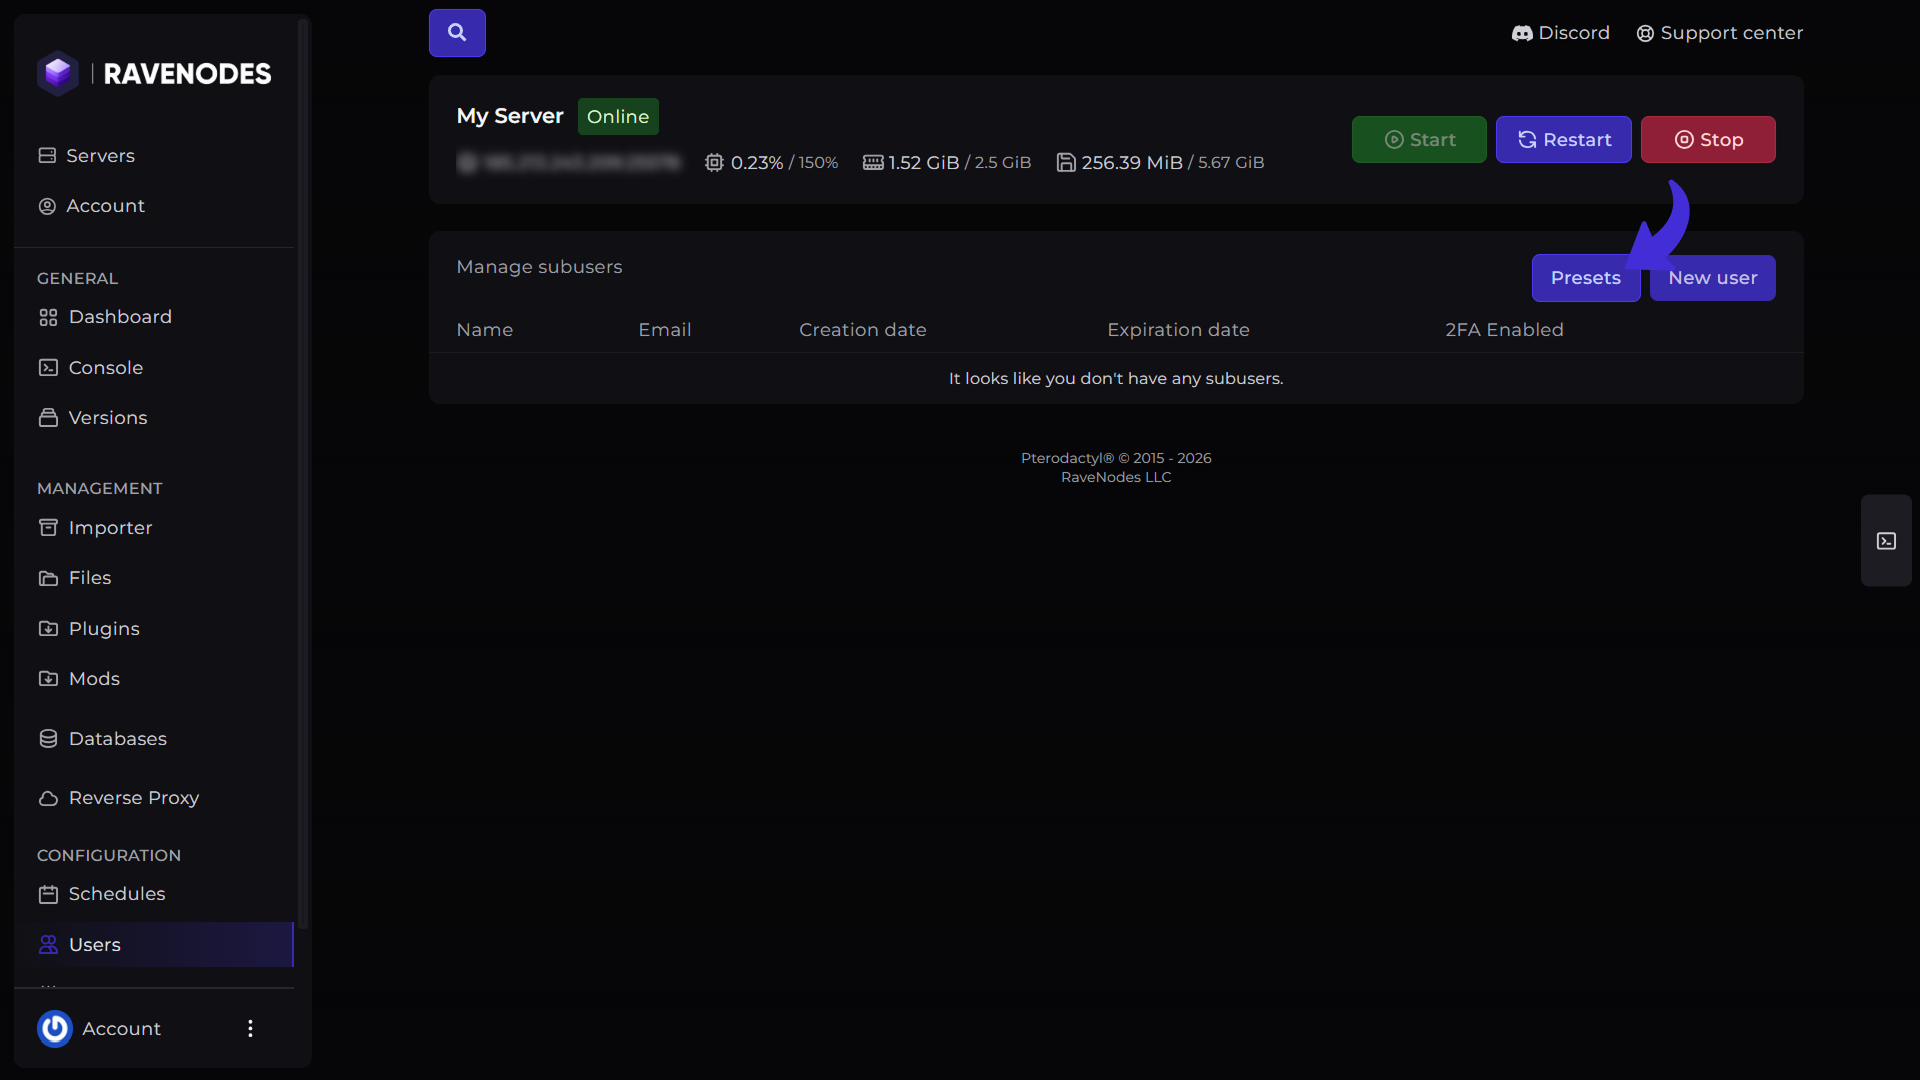
From the server navigation menu, click Subusers. Here you'll find your current subusers along with options to invite new users and manage permission presets.
Inviting a New Subuser
To invite someone to your server:
-
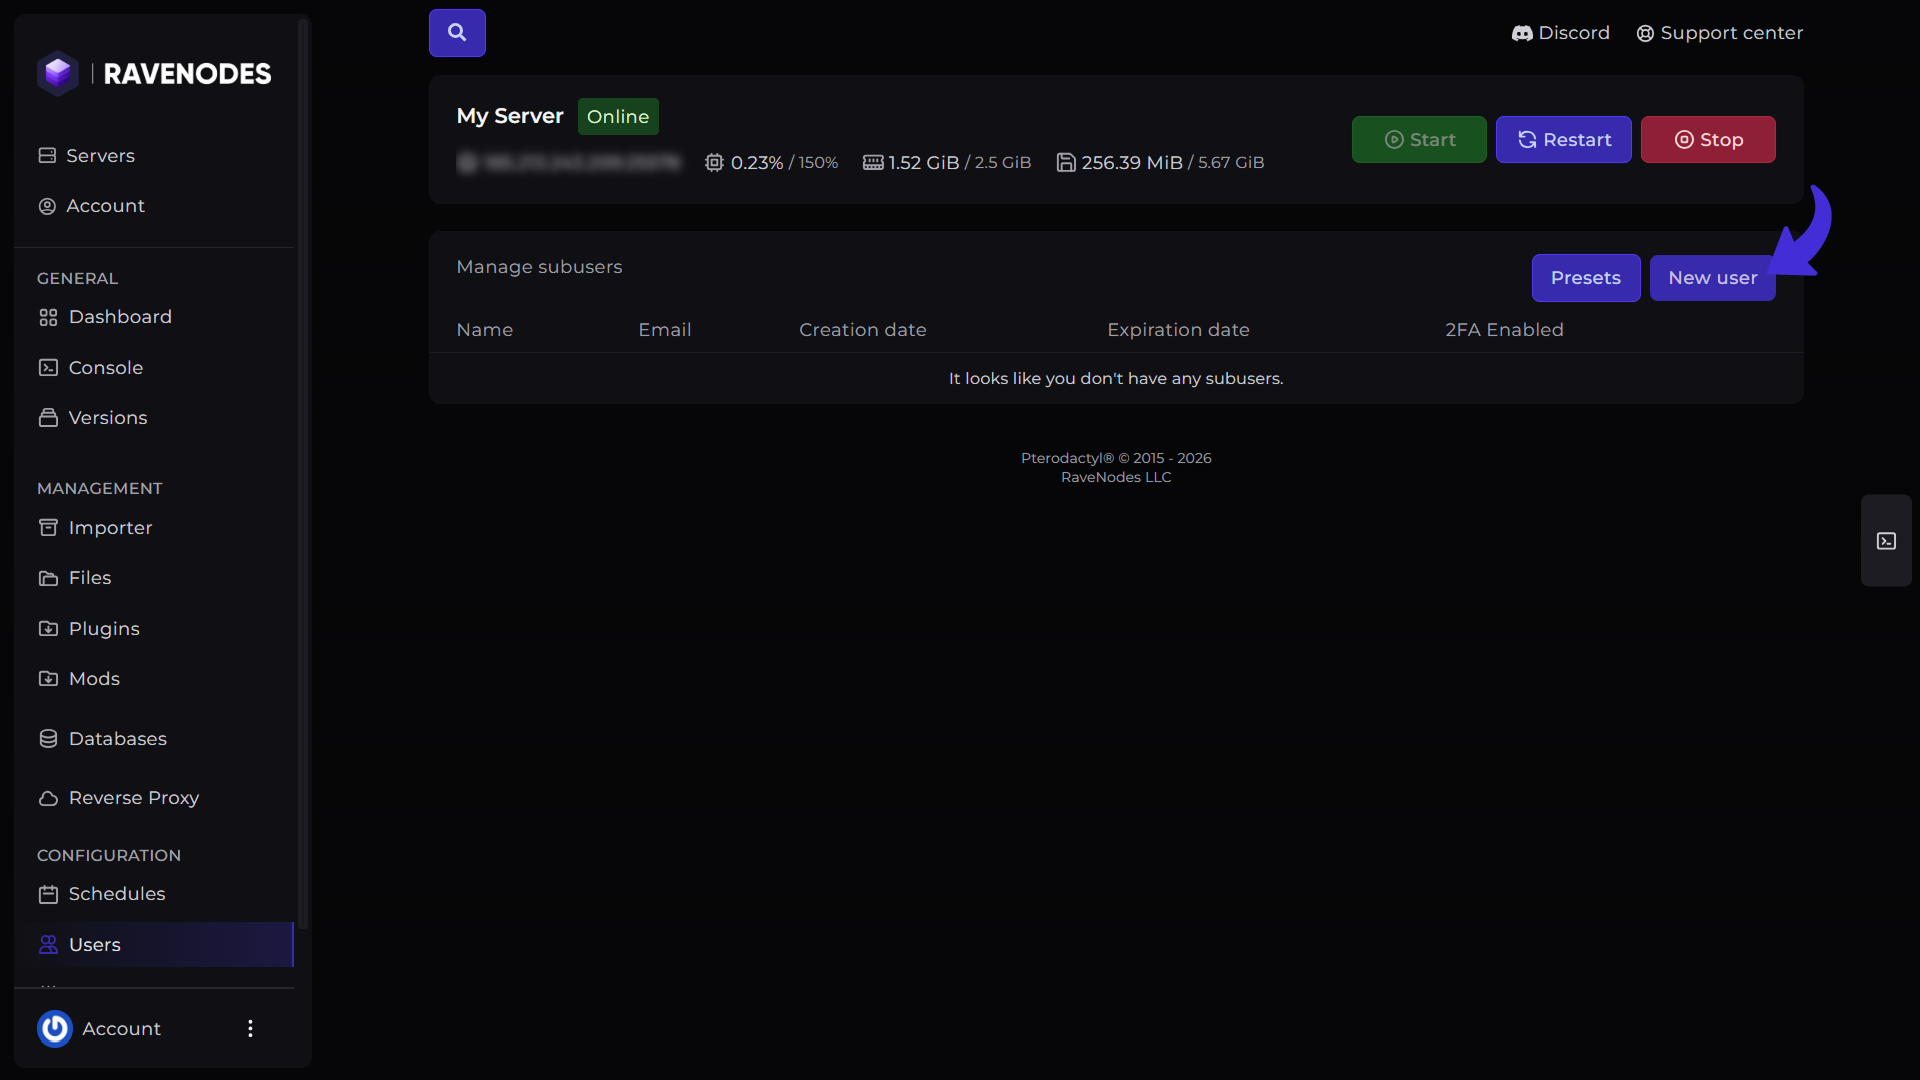
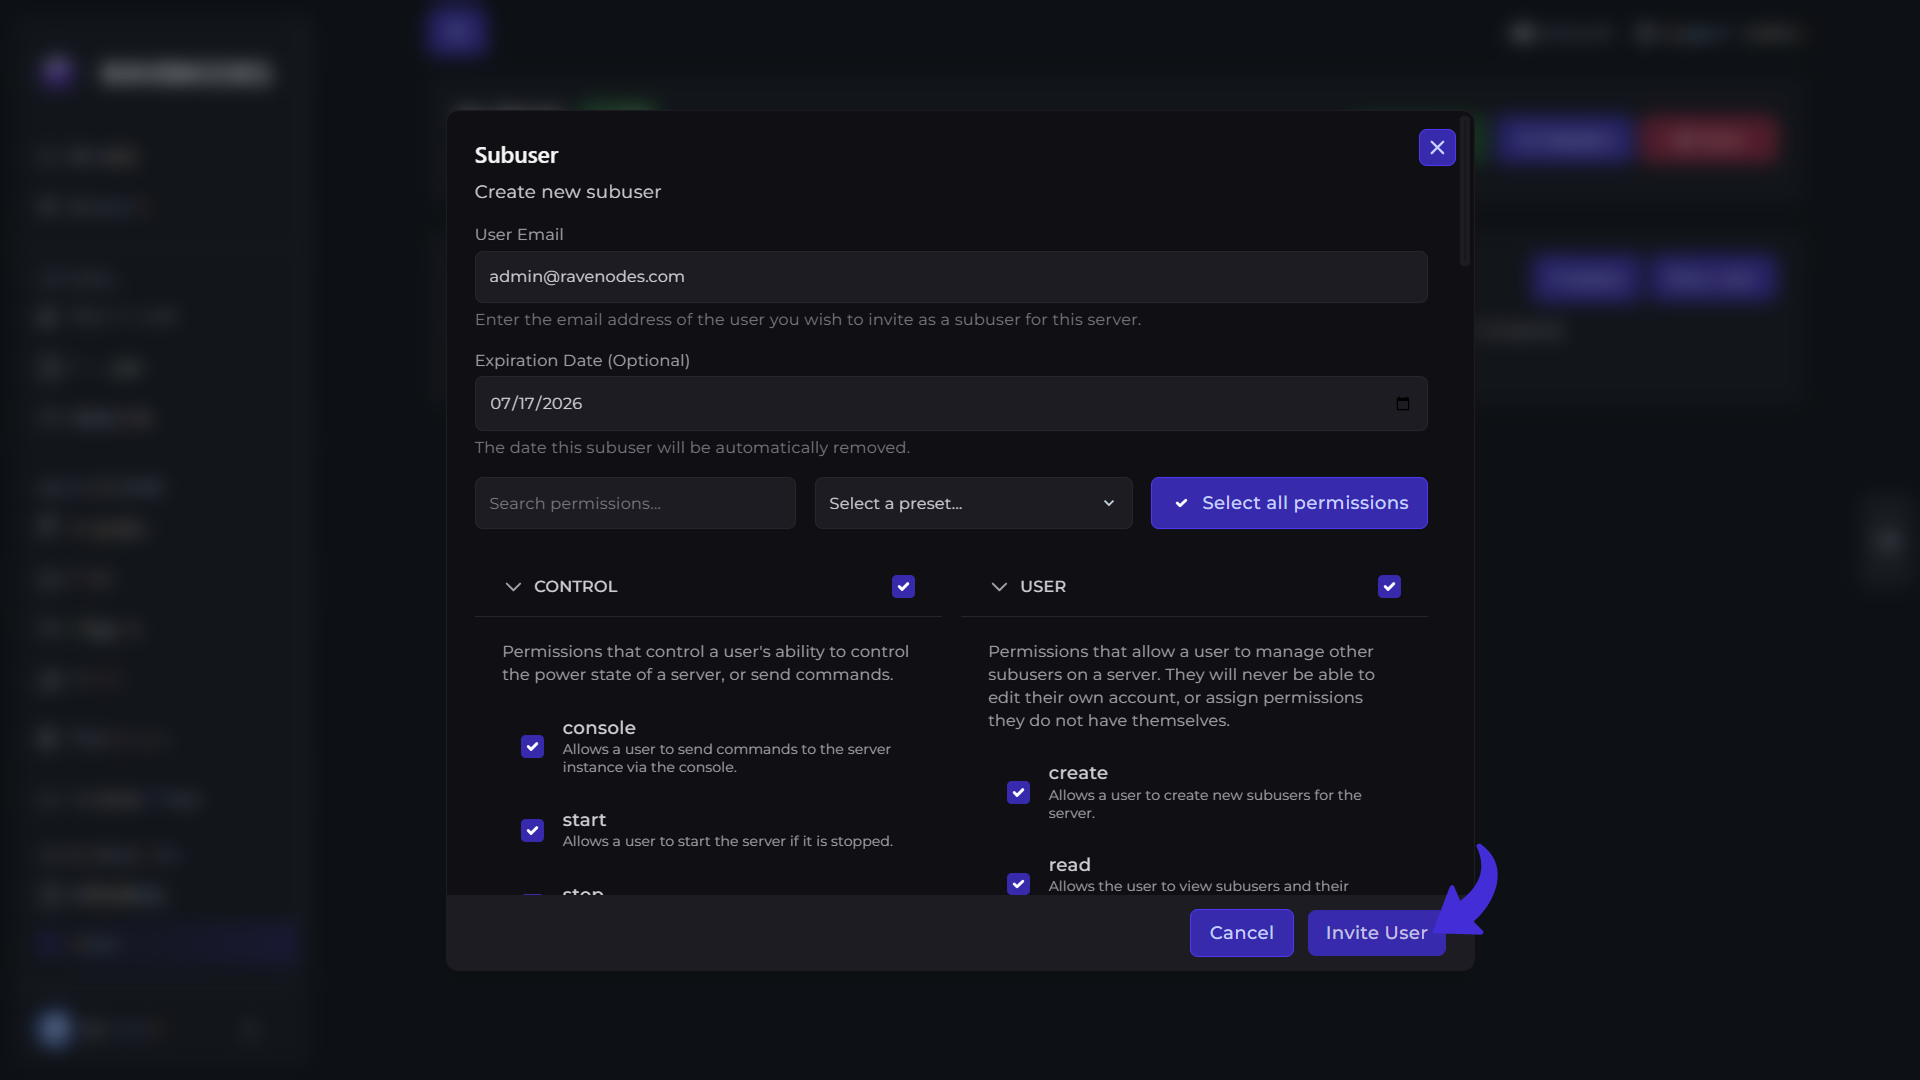
Click New User.
-
Enter the user's email address.
-
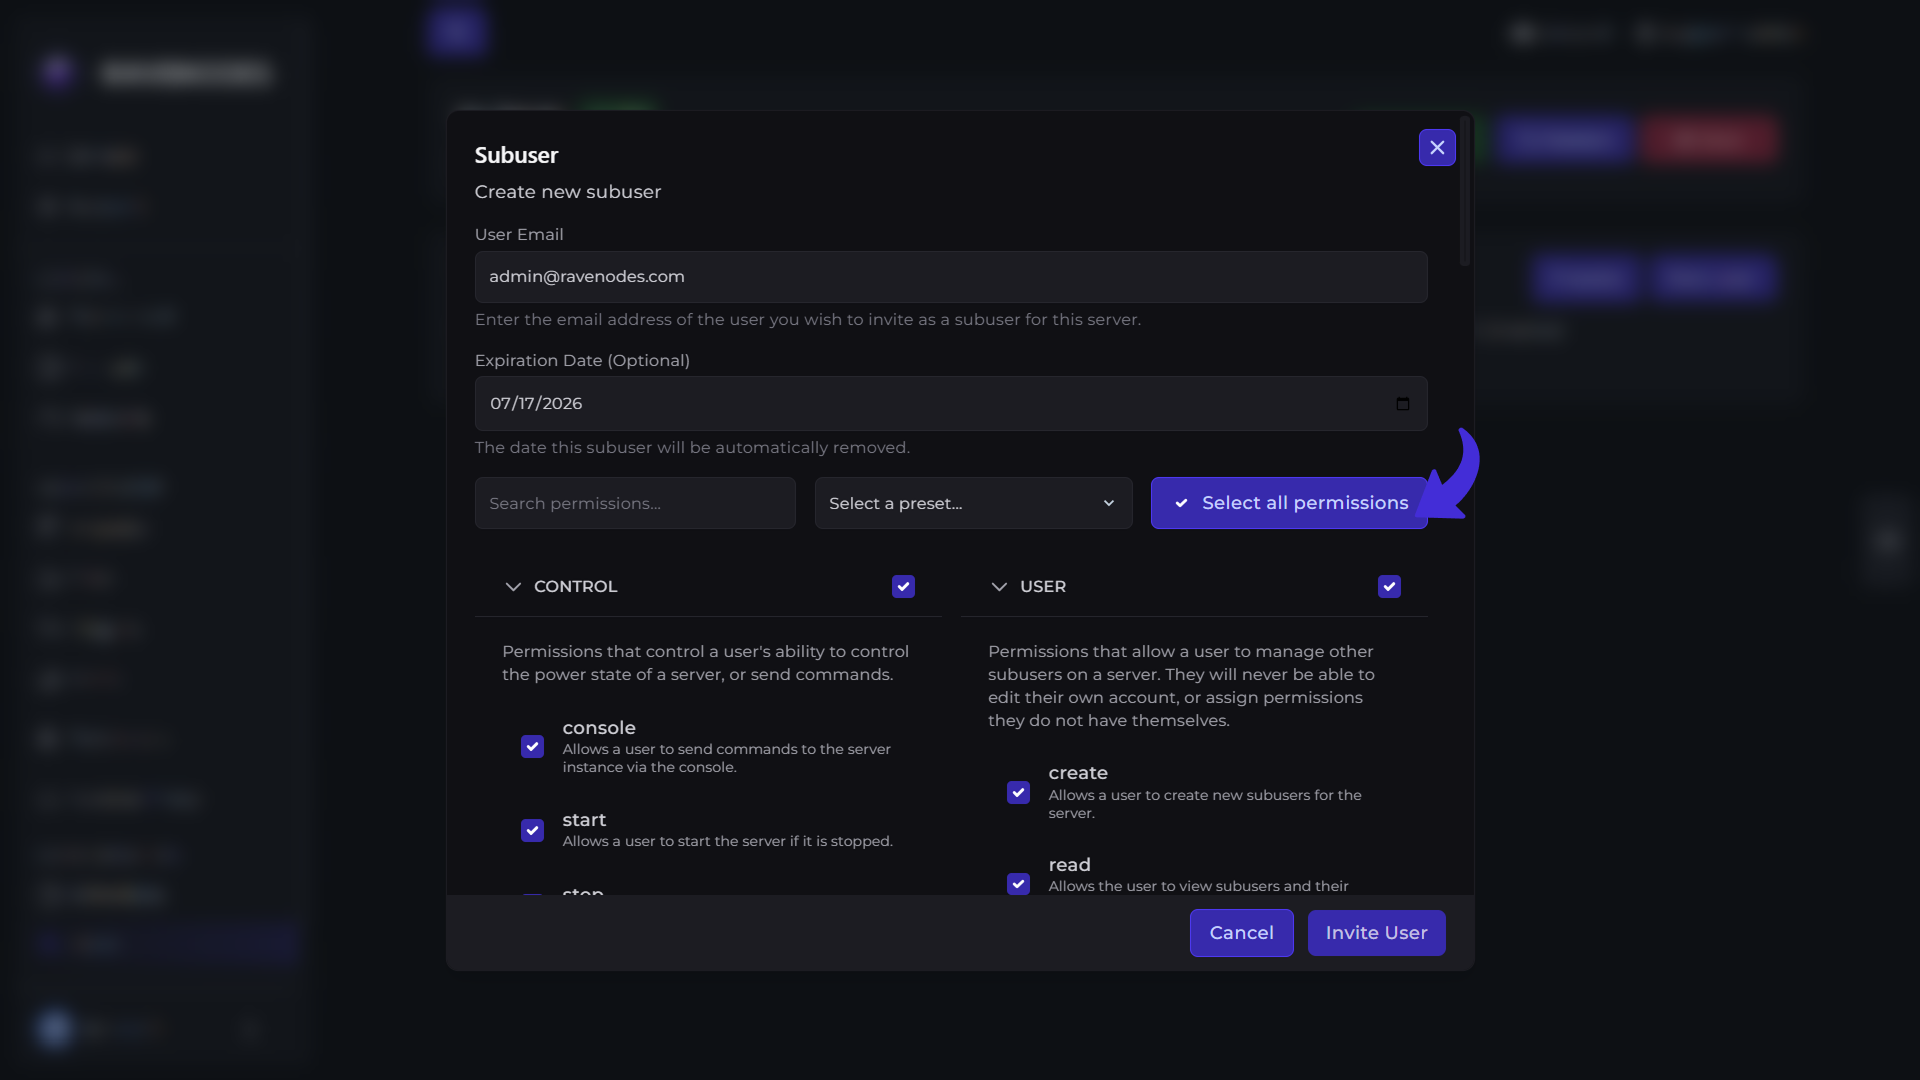
(Optional) Choose an Expiration Date & Time.
The expiration date is optional. If specified, the user's access will automatically expire on the selected date and time.
Next, choose the permissions you want the user to have.
You can:
-
Select individual permissions.
-
Use the search bar to quickly find specific permissions.
-
Click Grant All Permissions to give the user full access to the server.
Once you're happy with the selected permissions, send the invitation.
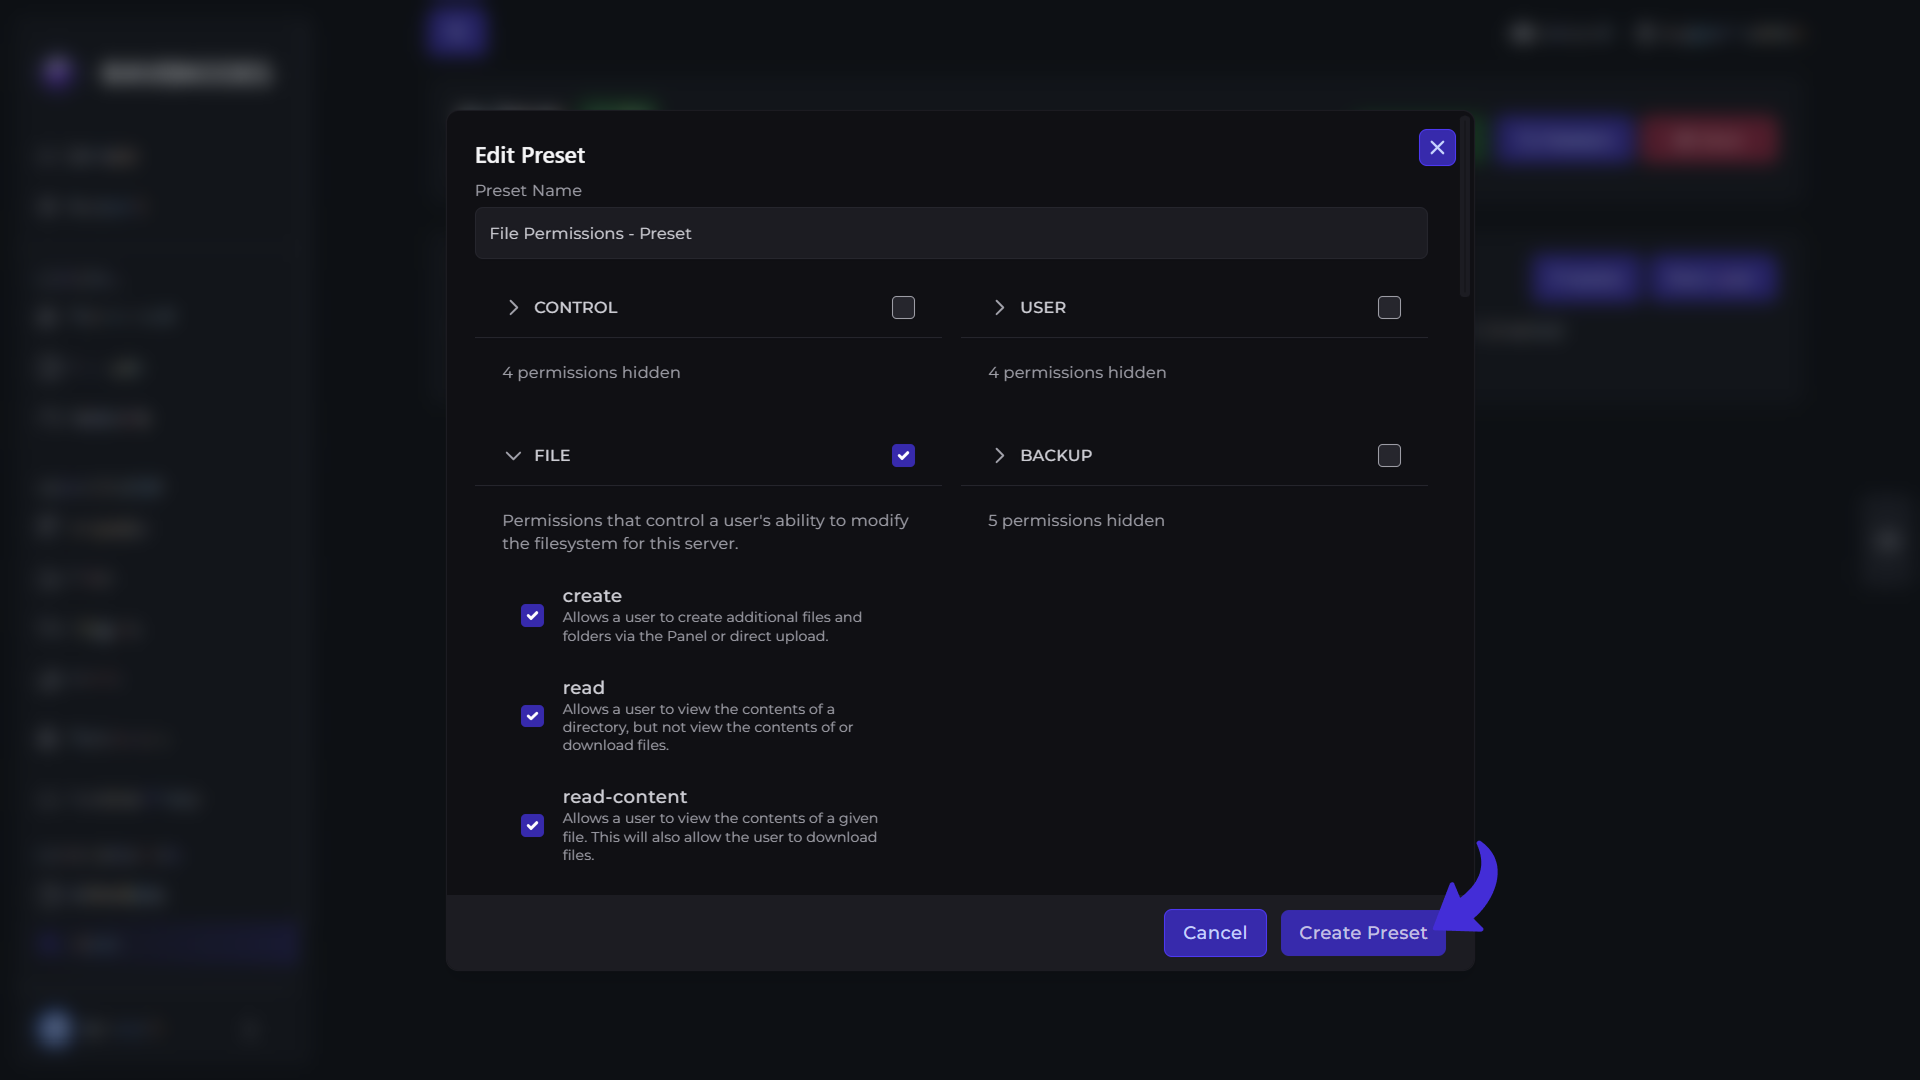
Creating a Permission Preset
To create a preset:
-
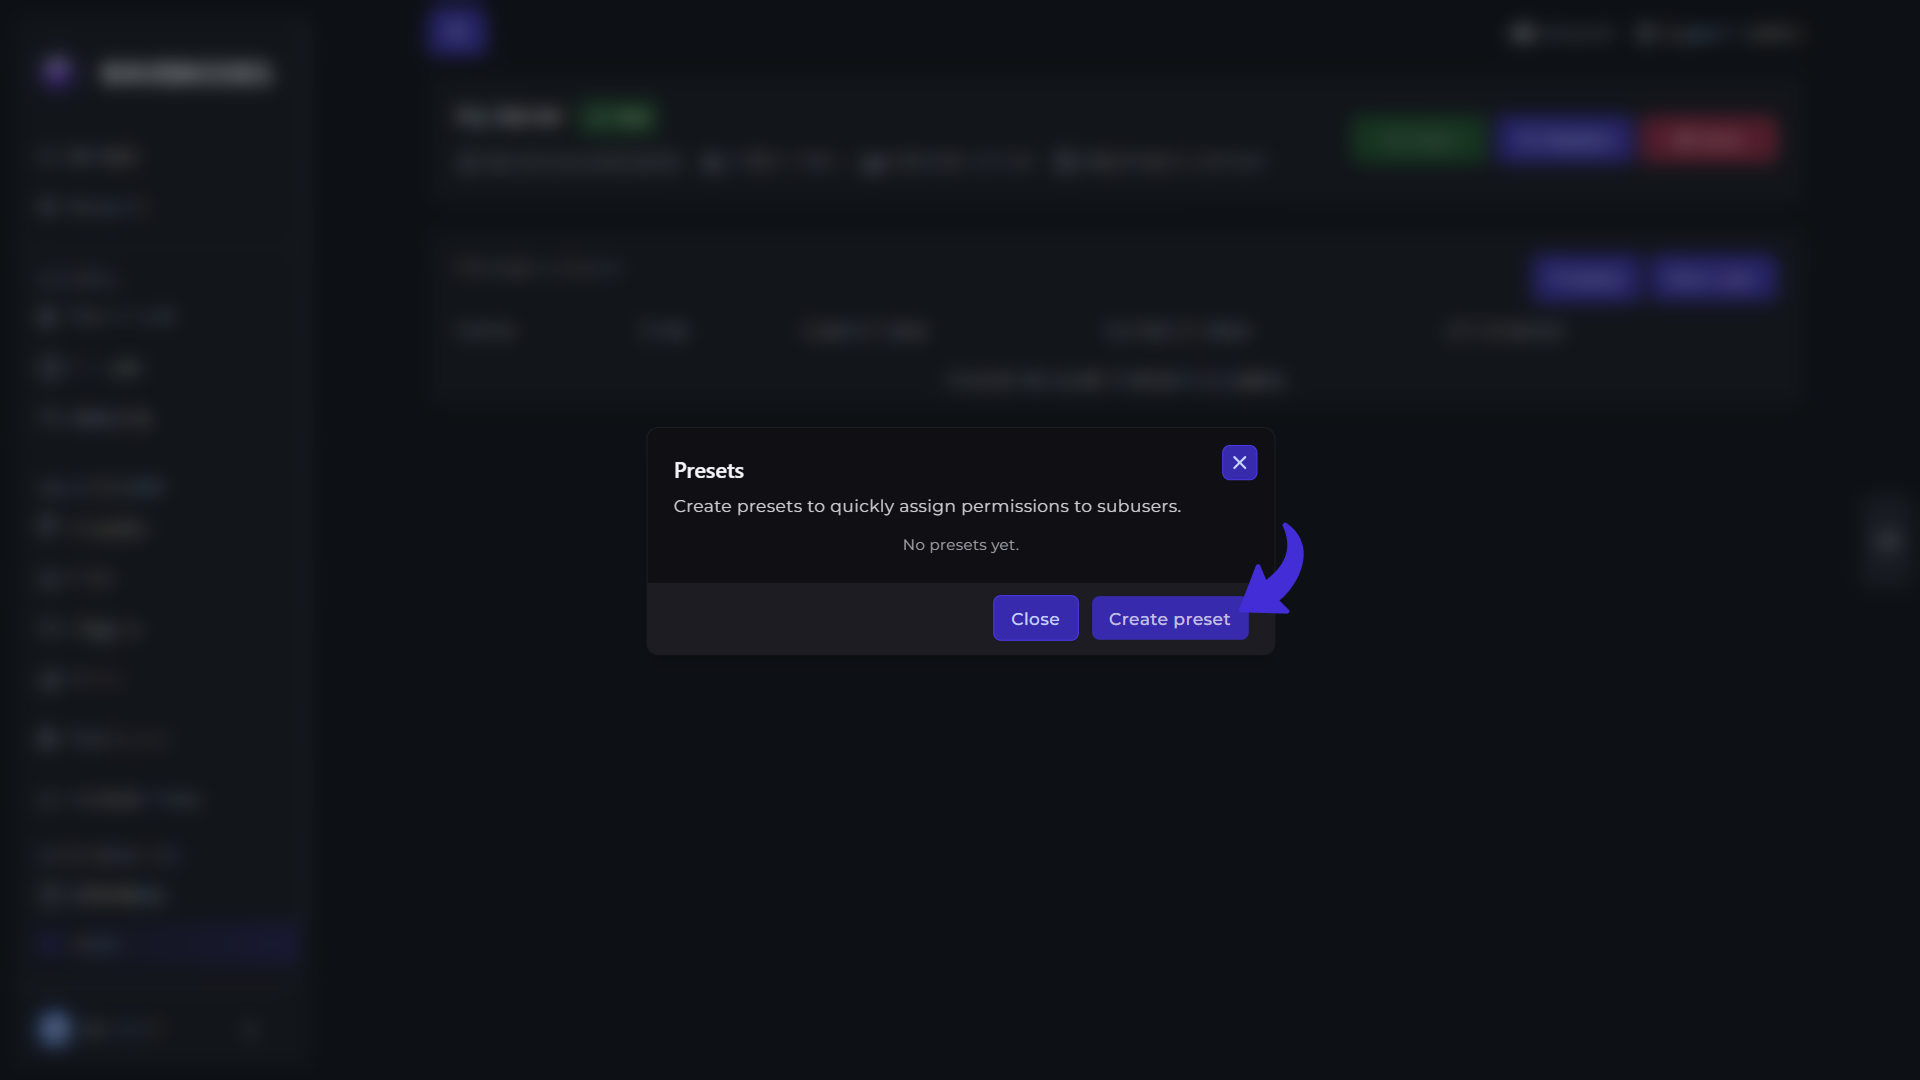
Open Presets.
-
Click Create Preset.
-
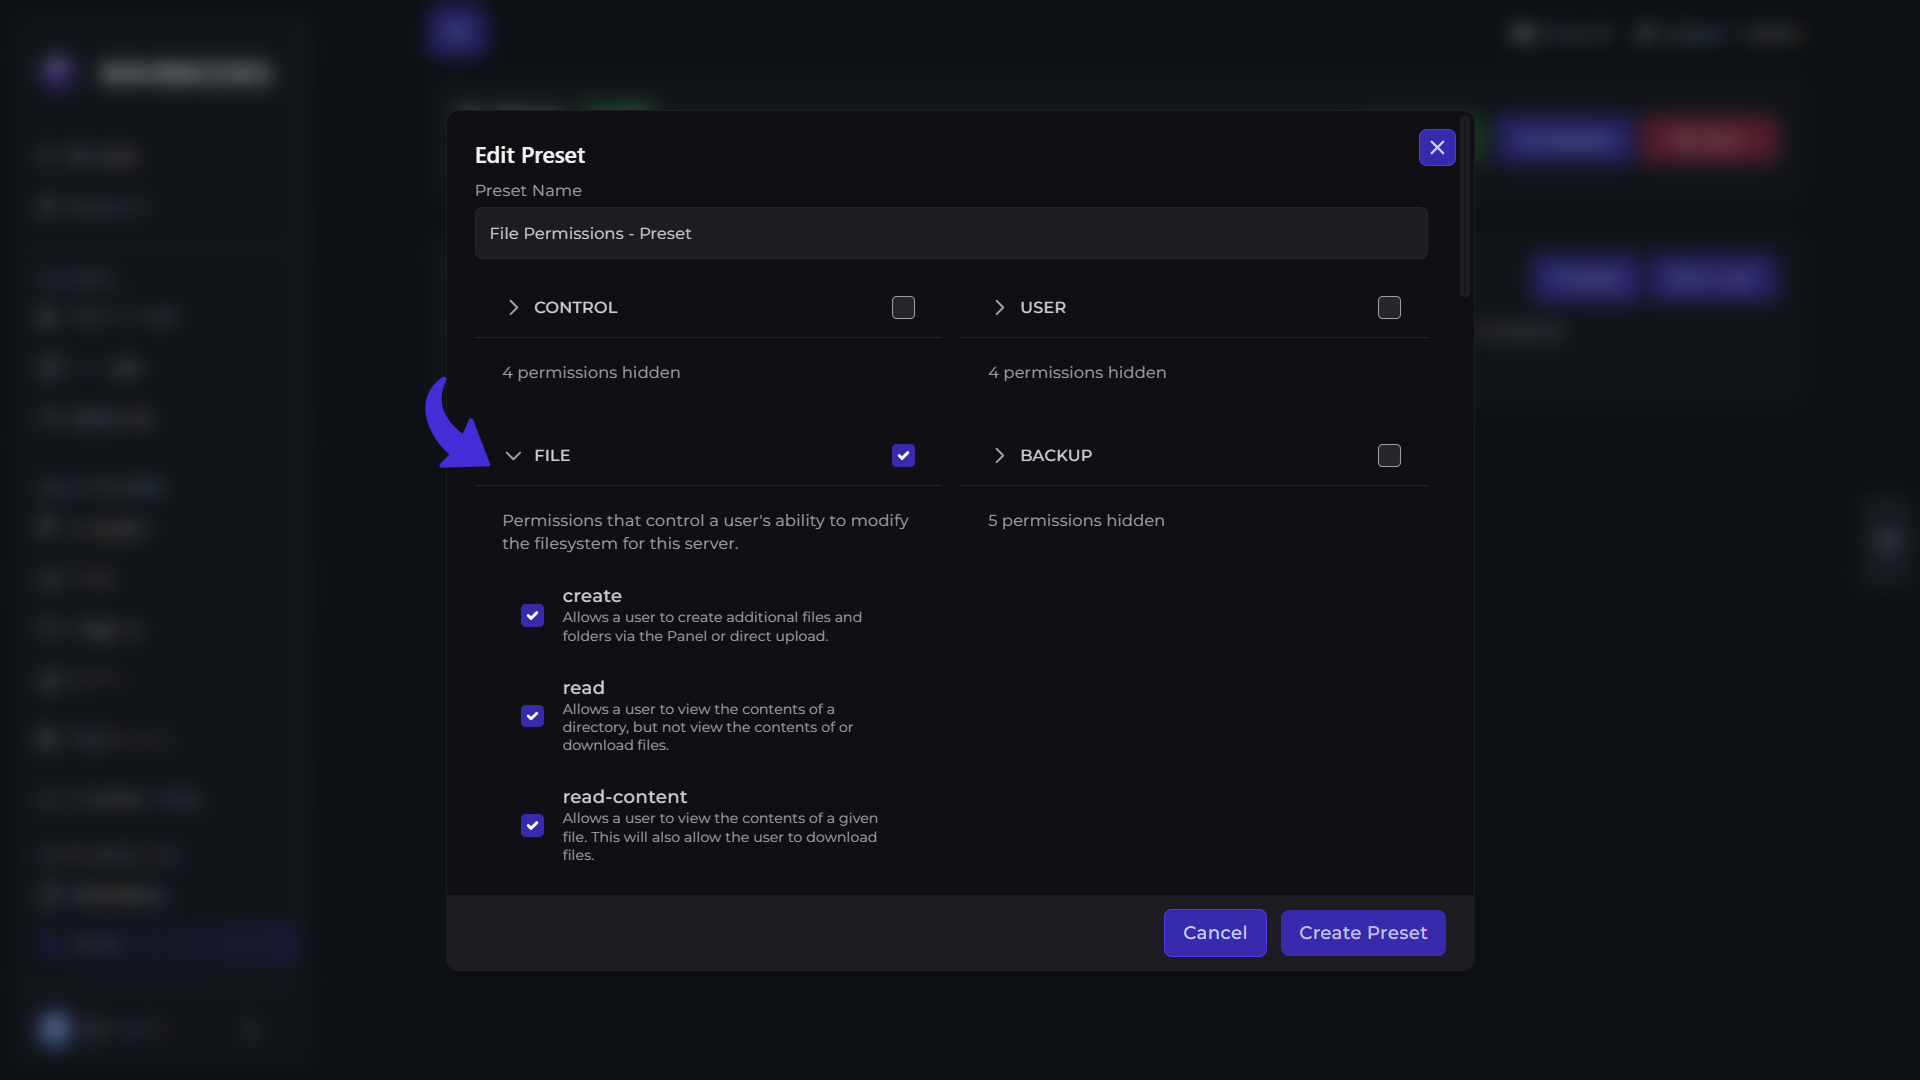
Enter a name for the preset.
-
Select the permissions you want to include.
-
Save the preset.
Your new preset will now be available whenever you invite a new subuser.
Using Permission Presets
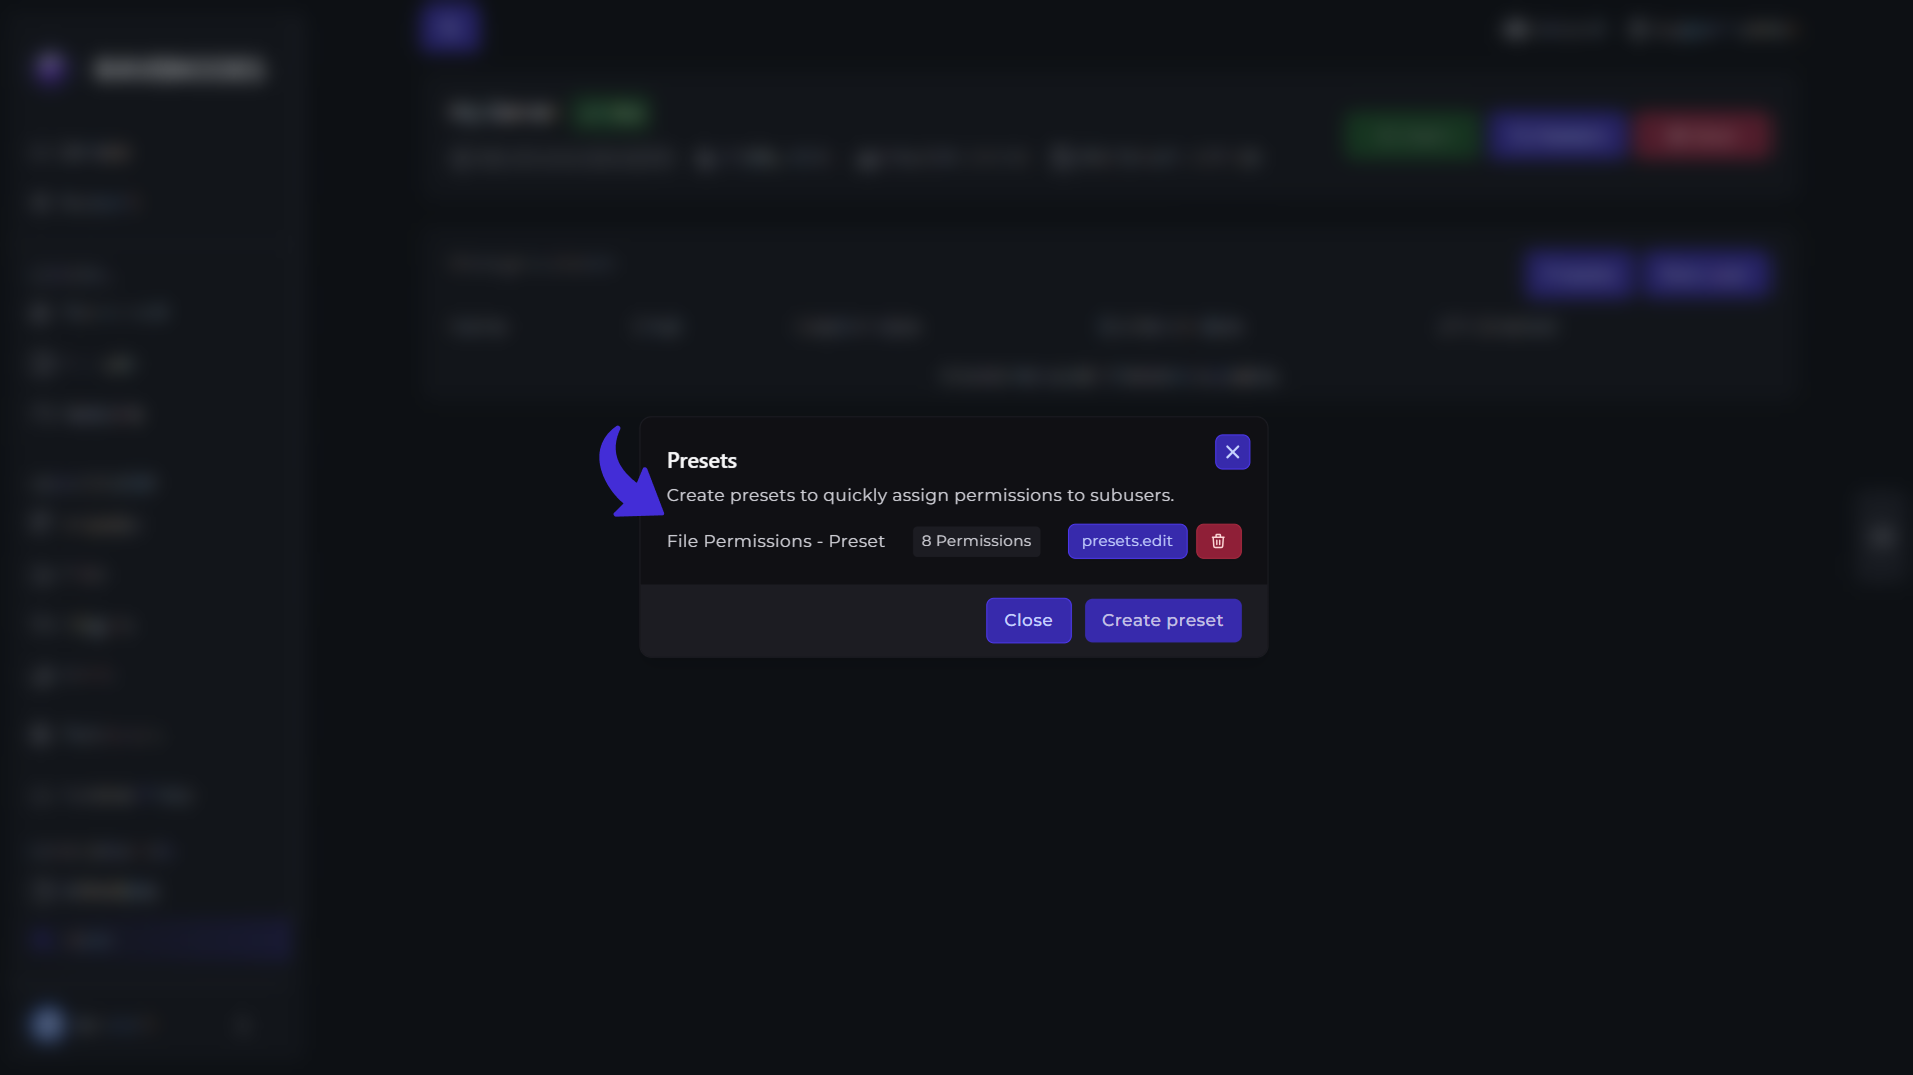
If you frequently invite users with the same permissions, you can use Permission Presets. From the Subusers page, click Presets.
Here you can:
-
View your existing presets.
-
Create new permission presets.
-
Edit existing presets.
-
Delete presets you no longer need.
For example, you could create presets such as:
-
Console Only
-
Moderator
-
Developer
-
File Manager Access
-
Full Administrator
Using presets saves time and ensures permissions remain consistent across multiple users.
Applying a Preset When Inviting a User
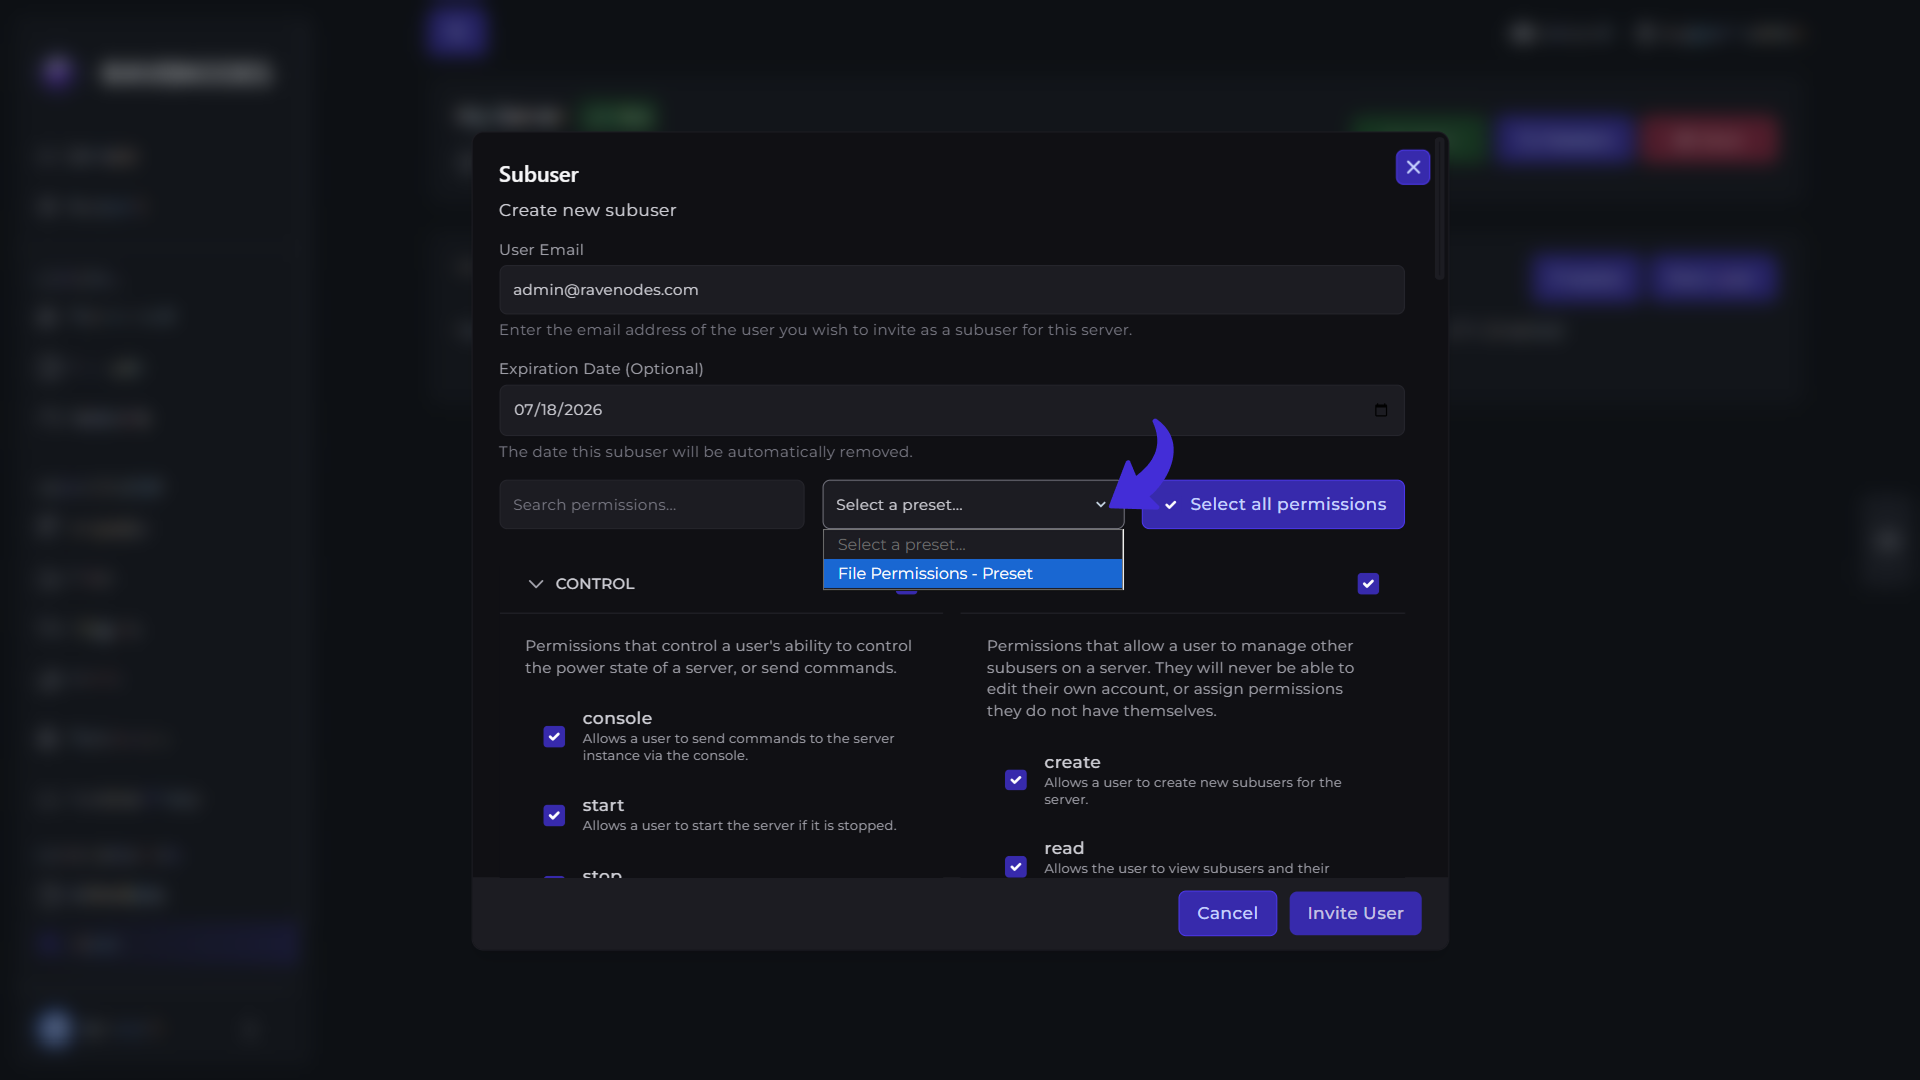
When inviting a new subuser, you can quickly apply one of your saved permission presets. Simply choose the desired preset in the New User dialog, and the associated permissions will be selected automatically. You can still make additional changes before sending the invitation if needed.
Tips
-
Grant only the permissions a user actually needs.
-
Use expiration dates for temporary staff members or collaborators.
-
Create permission presets for roles you use frequently.
-
Review your subusers and presets periodically to keep permissions organized.
Need Help?
If you encounter any issues, our support team is here to help. Open a support ticket through the Client Area, and we'll be happy to assist you.